

In this post I'm going to show how to create a minimal Microservice with Rust and the Hyper Crate.
Microservices are tiny, independent servers that perform specific tasks.
The first thing you need is the Rust Toolchain.
To install Rust visit https://www.rust-lang.org or https://rustup.rs
Im currently using MacOS so I installed Rust using the command…
> curl https://sh.rustup.rs -sSf | shIf you have Rust already installed then nows a good time to update your Rust compiler. The easiest way is by running...
> Rustup updateTo get going we can use cargo to make a new project called “rust-microservice”
> cargo new rust-microserviceNow open your newly created folder and add the Hyper crate dependency. This can be done by hacking your Cargo.toml file:
[dependencies]
hyper = “0.12.27”
I find the the problem with this approach is you have to lookup the version of the crate you want on crates.io . A nice tip to get around this is to install a cargo crate management sub-command. You can view all your globally installed cargo sub-commands using cargo...
> cargo install —listIf you don't already have it installed then...
> cargo install cargo-editNow you can easily install the Hyper crate…
> cargo add hyperThis command saves you having to look up the crates latest version. If you run into problems using later versions of any of the dependencies in this post then just use the versions I’m using here.
The Hyper crate basically lets our Microservice operate with the HTTP protocol.
Open your src > main.rs file and lets import the Hyper types our Microservice will need…
// Import required types
use hyper::{Body, Response, Server};
use hyper::rt::Future;
use hyper::service::service_fn_ok;
Now lets create a socket address we can bind to. A socket address consists of an IP address and a port number.
fn main() {

    // create a socket address
    let addr = ([127, 0, 0, 1], 8080).into();
now we need a server handler…
    // create our server handler
    let server = builder.serve(|| {
        service_fn_ok(|_| {
            Response::new(Body::from(“minimal microservice"))
        })
    });
And to keep things simple lets drop any errors for now...
    // drop any errors
    let server = server.map_err(drop);
And now we can start the server so it listens for requests…
    // start the server
    hyper::rt::run(server);
}
Your main.rs file should now look like this...
use hyper::{Body, Response, Server};
use hyper::rt::Future;
use hyper::service::service_fn_ok;

fn main() {

    // create a socket address
    let addr = ([127, 0, 0, 1], 8080).into();

    let builder = Server::bind(&addr);

    let server = builder.serve(|| {
        service_fn_ok(|_| {
            Response::new(Body::from("minimal microservice"))
        })
    });

    let server = server.map_err(drop);

    hyper::rt::run(server);

}
You can clone this starter template from my GitHub repo
Build the Microservice and download the Hyper crate and all its dependencies...
> cargo runThen pull up your browser and test your microservice is running by browsing to http://localhost:8080
Our minimal Rust Microservice should now be up and running although it doesn’t do much yet.
Let's build it out to support REST methods. Our Microservice will add product ID’s via one method and list them on another.
Let's update the types we will use to support our REST methods...
// Import required types
use std::fmt;
use std::sync::{Arc, Mutex};
use slab::Slab;
use futures::{future, Future};
use hyper::{Body, Error, Method, Response, Request, Server, StatusCode};
use hyper::service::service_fn;
use regex::Regex;
use lazy_static::lazy_static;- Format (fmt) is used to format arguments at runtime into strings, similar to C’s printf function.
- Arc is a thread safe reference-counting pointer.
- We’re going use a Mutex to protect our shared data - Basically, it checks that only one thread can access our shared data at a time.
- Slab is a collection type that isn’t part of the Standard Library so we’ll add this as a dependency, it’s useful as it’s similar to a Vector but it returns the key when storing a value.
- Futures are a similar concept to async and await in JavaScript and C#.
- We’ll use Regular expressions along with the lazy_static macro so we can construct pattern matching for our REST requests.
Let’s add these additional crates to our Cargo.toml file...
> cargo add slab
> cargo add futures
> cargo add regex
> cargo add lazy_static
Next create a constant to hold some HTML we can return to test our Microservice is up...
const INDEX_PAGE: &str = r#"
<!doctype html>
<html>
    <head>
        <title>Rust minimal microservice</title>
    </head>
    <body>
    <h2>Rust minimal microservice</h2>
    </body>
</html>
"#;
Now we will define types for our ProductId and ProductDb, Struct for our ProductData and implement a formatter so we can easily cast objects to strings...
type ProductId = u64;
struct ProductData;

impl fmt::Display for ProductData {
    fn fmt(&self, f: &mut fmt::Formatter) -> fmt::Result {
        f.write_str("{}")
    }
}

// database
type ProductDb = Arc<Mutex<Slab<ProductData>>>;
We will be using regular expressions to match our path patterns to our REST methods. The patterns we need to match are as follows...
- Index page
- Product Creation
- Product List
Let's hold our regular expression constants in a lazy static block...
// Regex routings
lazy_static! {
    static ref INDEX_PATH: Regex = Regex::new("^/(index\\.html?)?$").unwrap();
    static ref PRODUCT_PATH: Regex = Regex::new("^/product/((?P<product_id>\\d+?)/?)?$").unwrap();
    static ref PRODUCTS_PATH: Regex = Regex::new("^/products/?$").unwrap();
}
Next, create a helper method to build HTTP status codes that our Microservice will return with each request...
fn response_with_code(status_code: StatusCode) -> Response<Body> {
    Response::builder()
        .status(status_code)
        .body(Body::empty())
        .unwrap()
}
Let's keep the core CRUD (Create, Read, Update, Delete) functionality of our Microservice in a dedicated request handler function. This will employ our regular expressions to match the requested paths and associate them with relevant HTTP methods (POST, GET, PUT, DELETE)...
fn req_handler(req: Request<Body>, product_db: &ProductDb) -> impl Future<Item=Response<Body>, Error=Error>
{
    // 1. unimplemented!();
    let response = {

    // matching expressions
    let method = req.method();
    let path = req.uri().path();
    let mut products = product_db.lock().unwrap();

    if INDEX_PATH.is_match(path) {
        if method == &Method::GET {
            Response::new(INDEX_PAGE.into())
        } else {
            response_with_code(StatusCode::METHOD_NOT_ALLOWED)
        }
    } else if PRODUCTS_PATH.is_match(path) {
        if method == &Method::GET {
            let list = products.iter()
                .map(|(id, _)| id.to_string())
                .collect::<Vec<String>>()
                .join(",");
            Response::new(list.into())
        } else {
            response_with_code(StatusCode::METHOD_NOT_ALLOWED)
        }
    } else if let Some (cap) = PRODUCT_PATH.captures(path) {
        let product_id = cap.name("product_id").and_then(|p| {
            p.as_str()
                .parse::<ProductId>()
                .ok()
                .map(|x| x as usize)
        });
            // detect the HTTP method
            match (method, product_id) {
                (&Method::GET, Some(id)) => {
                    if let Some(data) = products.get(id) {
                        Response::new(data.to_string().into())
                    } else {
                        response_with_code(StatusCode::NOT_FOUND)
                    }
                },
                (&Method::POST, None) => {
                    let id = products.insert(ProductData);
                    Response::new(id.to_string().into())
                },
                (&Method::POST, Some(_)) => {
                    response_with_code(StatusCode::BAD_REQUEST)
                },
                (&Method::PUT, Some(id)) => {
                    if let Some(product) = products.get_mut(id) {
                       *product = ProductData;
                       response_with_code(StatusCode::OK)
                    } else {
                       response_with_code(StatusCode::NOT_FOUND)
                    }
                },
                (&Method::DELETE, Some(id)) => {
                    if products.contains(id) {
                        products.remove(id);
                        response_with_code(StatusCode::OK)
                    } else {
                        response_with_code(StatusCode::NOT_FOUND)
                    }
                },
                _ => {
                    response_with_code(StatusCode::METHOD_NOT_ALLOWED)
                },
            }
        } else {
            response_with_code(StatusCode::NOT_FOUND)
        }
    };
    future::ok(response)
}
Finally we can refactor our main function to use our new request handler. Let's create an in memory database where we can store our Product Id's...
// create database
let product_db = Arc::new(Mutex::new(Slab::new()));
Then refactor our server handler to use our new request handler function...
    // create our server handler
    let server = builder.serve(move || {
        let product_db = product_db.clone();
        service_fn(move |req| req_handler(req, &product_db))
    });
Our main function should now look like...
fn main() {

    // create a socket address
    let addr = ([127, 0, 0, 1], 8080).into();

    // create a server that returns a builder we can bind to our socket address
    let builder = Server::bind(&addr);

    // create database
    let product_db = Arc::new(Mutex::new(Slab::new()));

    // create our server handler
    let server = builder.serve(move || {
        let product_db = product_db.clone();
        service_fn(move |req| req_handler(req, &product_db))
    });

    // drop any errors
    let server = server.map_err(drop);

    // start the server
    hyper::rt::run(server);

}
Full code can be found on my GitHub repo
Now it's time to spin up our Microservice and test...
> cargo runUsing your browser navigate to http://localhost:8080 and you should see the static HTML returned from your Microservices root...

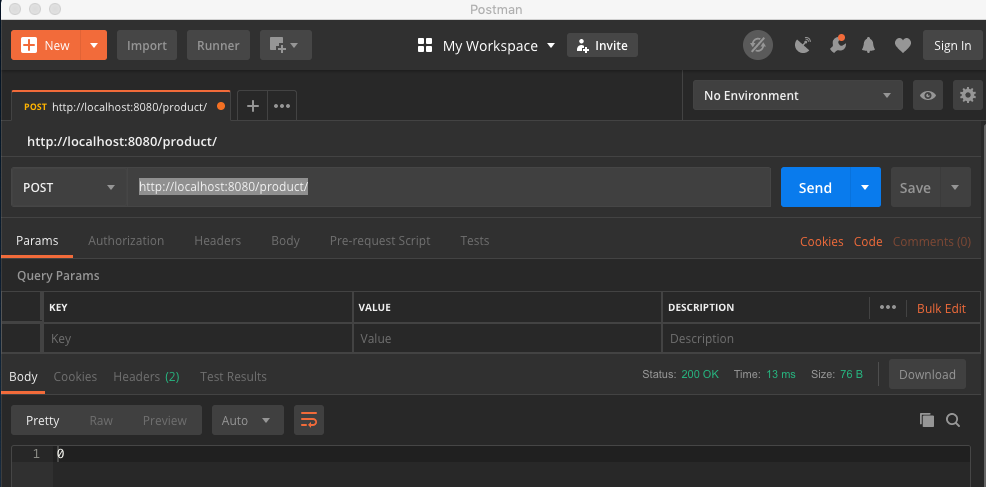
Using Postman, send a POST request to your Microservice... http://localhost:8080/product/
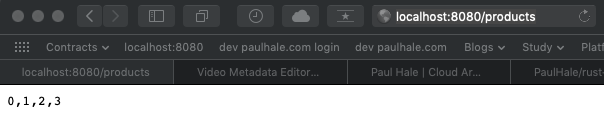
Send a few more posts requests from Postman and then navigate your browser to http://localhost:8080/products. You should see a list of your Product Id's...
You now have a minimal Rust Microservice up and running that conforms to REST principles using the Hyper, Futures, Slab, Regex and Lazy_Static crates.
Rust Microservice Development Tip
When developing microservices it’s useful to have your code auto-compile when changes are detected. This saves you from having to exit and restart the server as your coding and building out your microservice. A useful cargo subcommand for this is cargo-watch…
> cargo install cargo-watchNow you can auto-compile your code on the fly, similar to watch packages in Node by running...
> cargo watch -x “run”I have borrowed heavily from Denis Kolodin's excellent book "Hands-On Microservices with Rust" for this post. It's an excellent resource for building Microservices with Rust.
